Day04(06/01) HDFS的API及字符统计案例 (CharCount) 查看笔记合集
环境准备 1.先开启Zookeeper服务 需要先开启3台虚拟机上的Zookeeper服务和Hadoop服务,你也可使用自动化脚本来执行此操作。
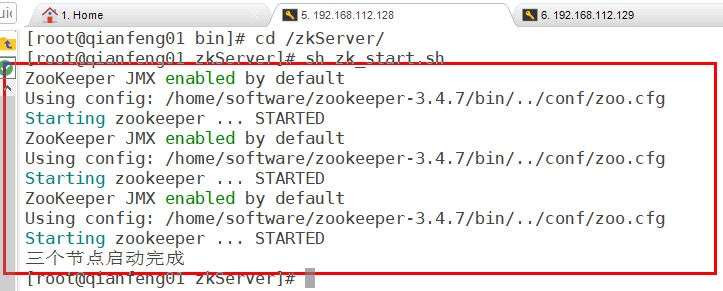
使用远程连接工具,连接到三台虚拟主机,先开启Zookeeper服务
1
2
3
4
5
# 以下命令需要在三台主机上同时执行 cd /home/software/zookeeper-3.4.7/bin/ # 进入bin目录,运行里面的脚本文件 sh zkServer.sh start # 开启zookeeper sh zkServer.sh status # 查看运行状态
若出现的Mode里,共有两个follower,一个leader,则说明服务是正常启动的。
2.在第一个节点上,启动Hadoop服务 start-all.sh
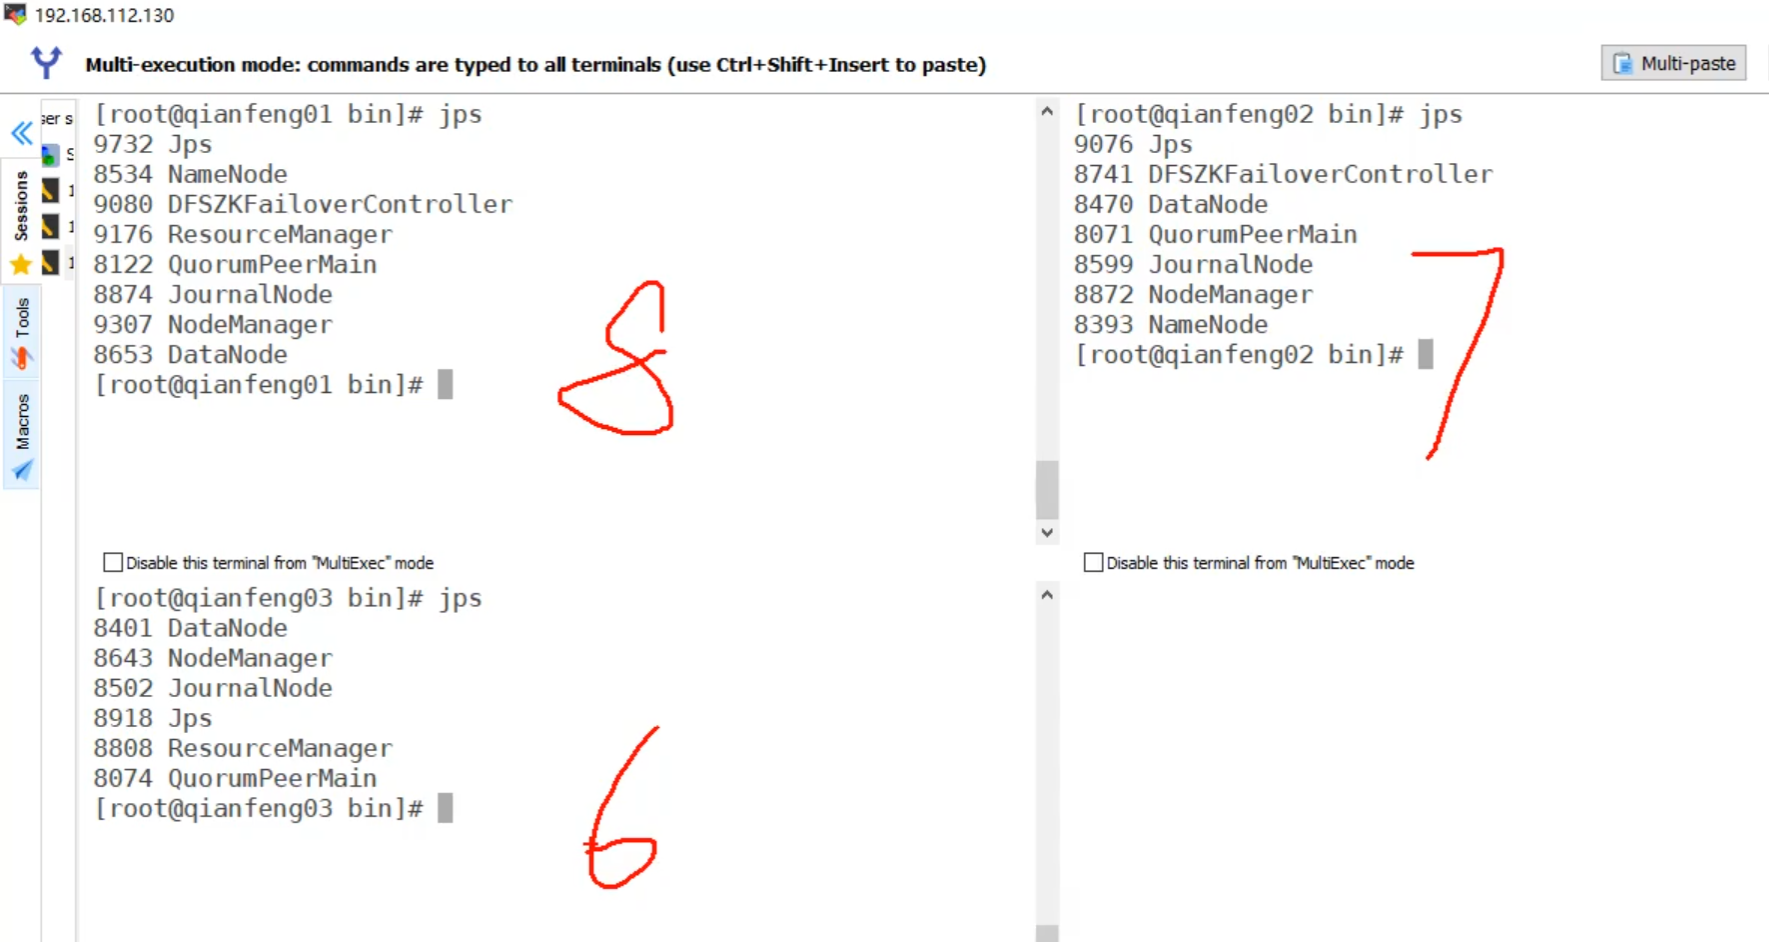
启动成功后,在三台主机上输入jps命令查看运行进行(BigData01,02,03对应的正确进程数应是8,7,6)。
若进程数不够需要单独在该结点上进行相应配置,参照下图来启动相应的结点。
3.编写Zookeeper启动脚本 在Linux本地创建 zkServer 文件夹,并编写脚本内容,
(便于同时启动三个节点上的Zookeeper服务,或者查看状态、关闭)
vim zk_start.sh,完成后保存并退出
复制出来,编写一个查看Zookeeper运行状态的脚本文件,
vim zk_start.sh ,完成后保存并退出
进行脚本测试,下次启动Zookeeper就可以在只在一个节点执行脚本文件了,比较方便。
4.该案例会用到IDE工具:IDEA 确保你的IDEA可以正常的创建JAVA项目,并且可以运行成功(已经配置好jdk1.8环境)
一、HDFS的API编写 打开IDEA,之前需要启动Zookeeper服务和Hadoop服务。
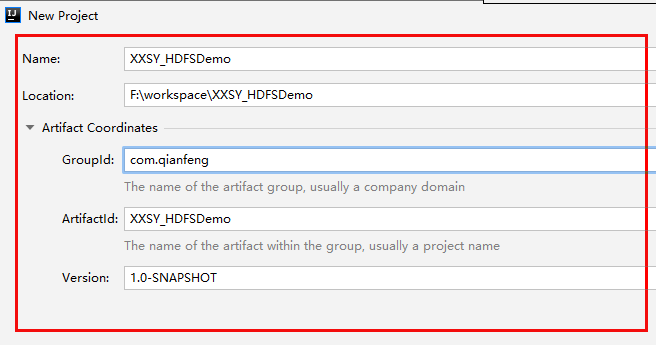
用IDEA新建一个Maven 项目,
用于在本地Windows环境上与HDFS文件系统进行交互。
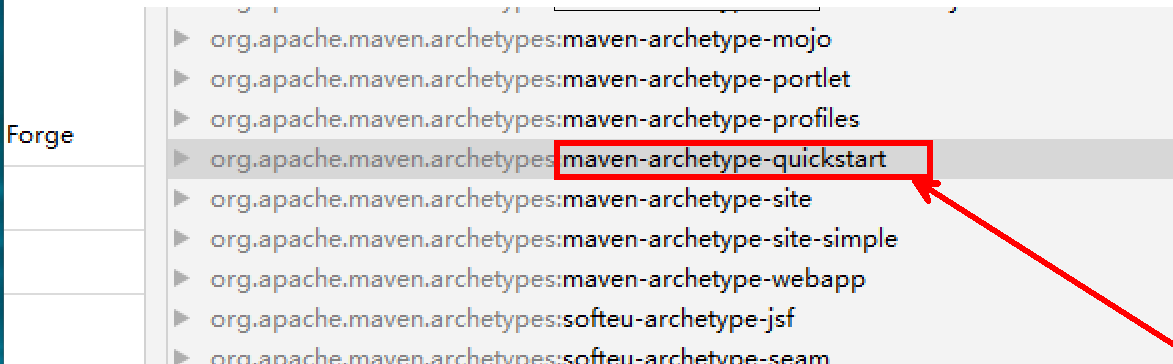
(0)配置Maven环境依赖 新建一个HDFS-Demo,保证是Maven项目
右键选择quickstart骨架,进行下一步创建。
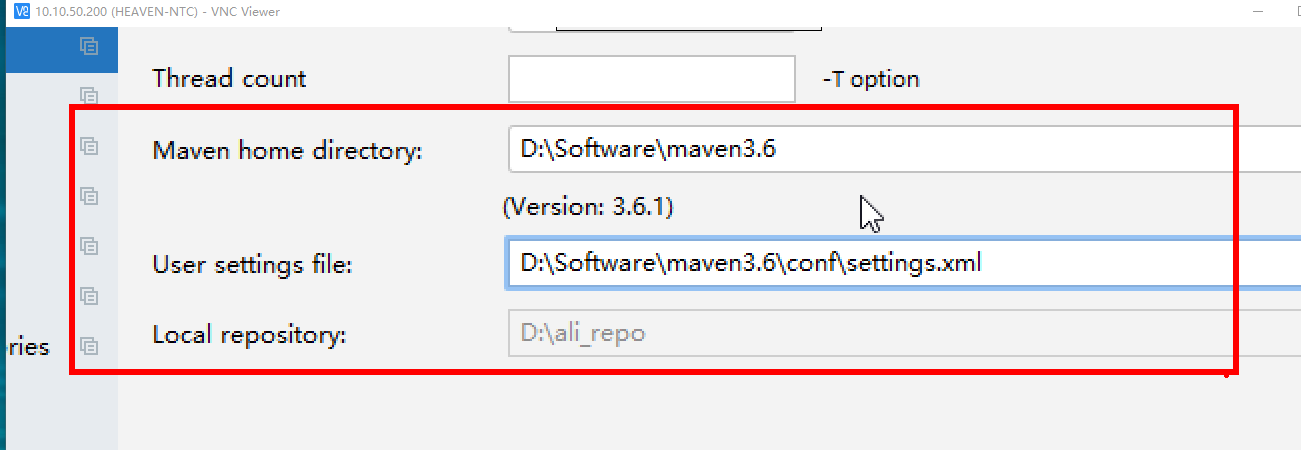
打开IDEA的设置界面,配置Maven的本地路径,(将maven3.6.zip压缩包解压到指定的文件路径下)
更改Maven的本地安装包路径,
编辑,pom.xml文件,添加以下依赖包文件,
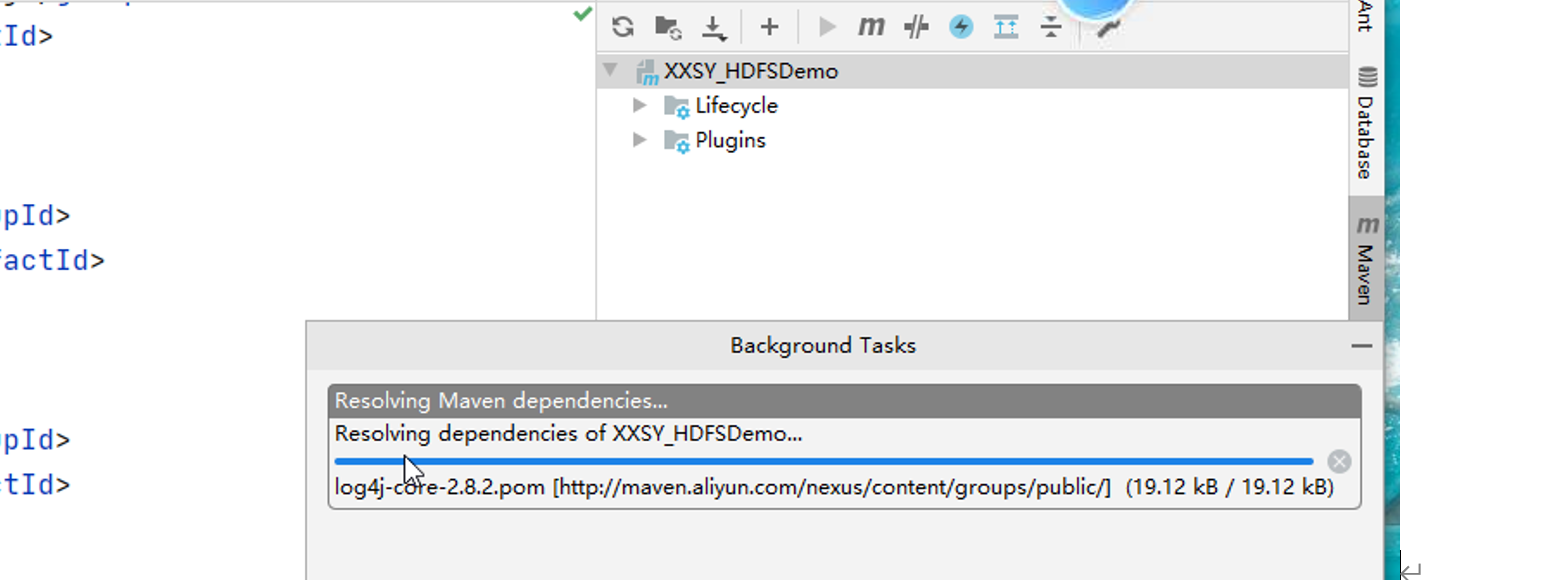
然后点击刷新按钮,等待下载这些依赖文件
1 2 3 4 5 6 7 8 9 10 11 12 13 14 15 16 17 18 19 20 21 22 23 24 25 26 27 <dependencies > <dependency > <groupId > junit</groupId > <artifactId > junit</artifactId > <version > 4.10</version > </dependency > <dependency > <groupId > org.apache.logging.log4j</groupId > <artifactId > log4j-core</artifactId > <version > 2.8.2</version > </dependency > <dependency > <groupId > org.apache.hadoop</groupId > <artifactId > hadoop-common</artifactId > <version > 2.7.6</version > </dependency > <dependency > <groupId > org.apache.hadoop</groupId > <artifactId > hadoop-hdfs</artifactId > <version > 2.7.6</version > </dependency > <dependency > <groupId > org.apache.hadoop</groupId > <artifactId > hadoop-client</artifactId > <version > 2.7.6</version > </dependency > </dependencies >
依赖下载完成后,我们就可以正式进入代码编写的环节了。
新建一个HDFSDemo.java文件,分别编写以下测试集代码,
(1)上传功能 1 2 3 4 5 6 7 8 9 10 11 12 13 14 15 16 17 18 19 20 21 22 23 24 25 @Test public void put () throws IOException { Configuration conf = new Configuration (); conf.set("dfs.replication" ,"3" ); FileSystem fs = FileSystem.get(URI.create("hdfs://这里填写自己结点状态的为Active的IP:9000" ),conf); OutputStream out = fs.create(new Path ("/demo.txt" )); FileInputStream in=new FileInputStream ("D:\\demo.txt" ); IOUtils.copyBytes(in,out,conf); in.close(); out.close(); }
(2)下载功能 1 2 3 4 5 6 7 8 9 10 11 12 13 14 15 16 17 18 19 20 21 @Test public void get () throws IOException { Configuration conf = new Configuration (); conf.set("dfs.replication" , "3" ); FileSystem fs = FileSystem.get(URI.create("hdfs://XX.XX.XX.XX:9000" ), conf); InputStream in = fs.open(new Path ("/demo.txt" )); FileOutputStream out = new FileOutputStream ("D:/a.txt" ); IOUtils.copyBytes(in,out,conf); in.close(); out.close(); }
(3)删除功能 1 2 3 4 5 6 7 8 9 10 11 12 13 14 15 16 17 @Test public void delete () throws IOException { Configuration conf = new Configuration (); conf.set("dfs.replication" , "3" ); FileSystem fs = FileSystem.get(URI.create("hdfs:XX.XX.XX.XX:9000" ), conf); InputStream in = fs.open(new Path ("/demo.txt" )); fs.delete(new Path ("/demo.txt" )); }
单独运行某个测试类,退出码为exit code 0说明运行成功,
然后打开浏览器来查看相应操作是否执行成功
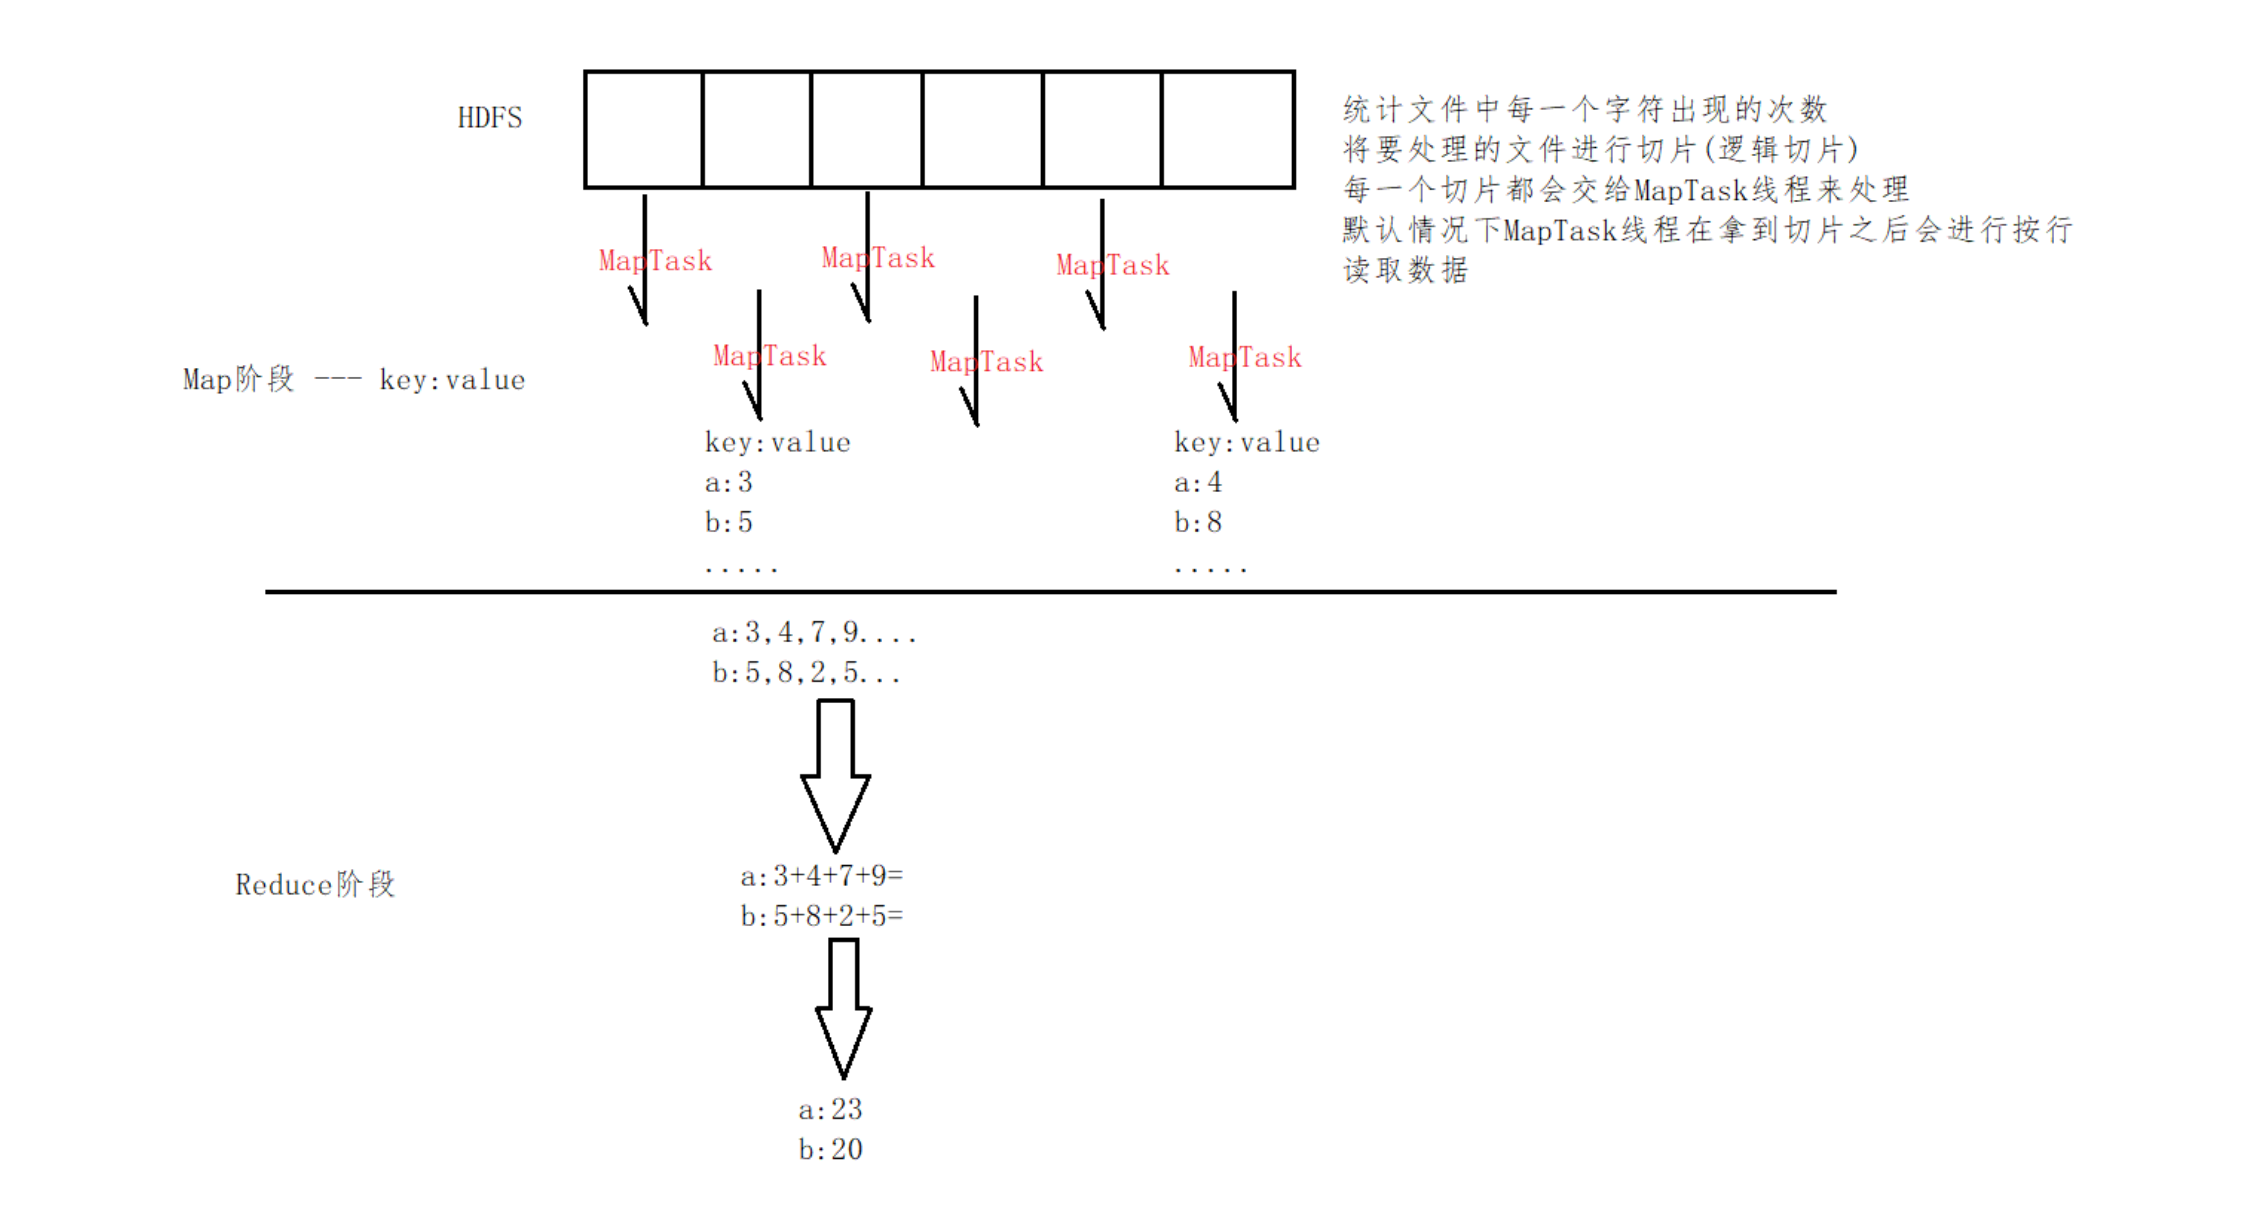
二、MapReduce技术细节 1.MapReduce是Hadoop提供的一套用于进行分布式计算的框架
2.MapReduce是将整个计算过程拆分为两个阶段
Map(映射)阶段 和 Reduce(规约)阶段
3.因为Hadoop对windows系统的兼容性极差,需要进行环境配置
三、编写字符统计案例 新建一个MapReduceDemo的Maven项目 (使用quickstart骨架),并将前一个项目的pom.xml的依赖配置
复制过来,刷新Maven配置。
1.代码编写 在charcount包下,编写以下三个类
(1).编写MapReduce程序的驱动类,CharcountDriver.java
1 2 3 4 5 6 7 8 9 10 11 12 13 14 15 16 17 18 19 20 21 22 23 24 25 26 27 28 29 30 31 32 33 34 35 36 public class CharcountDriver { public static void main (String[] args) throws IOException, ClassNotFoundException, InterruptedException { Configuration conf = new Configuration (); Job job = Job.getInstance(); job.setJarByClass(CharcountDriver.class); job.setMapperClass(CharcountMapper.class); job.setReducerClass(CharcountReducer.class); job.setMapOutputKeyClass(Text.class); job.setMapOutputValueClass(IntWritable.class); job.setOutputKeyClass(Text.class); job.setOutputValueClass(IntWritable.class); FileInputFormat.addInputPath(job, new Path ("hdfs://这里填写自己结点状态的为Active的IP:9000/words.txt" )); FileOutputFormat.setOutputPath(job, new Path ("hdfs://xx.xx.xx.xx:9000/result/wordcount" )); job.waitForCompletion(true ); } }
(2).编写Mapper类,CharcountMapper.java
1 2 3 4 5 6 7 8 9 10 11 12 13 14 15 16 17 18 19 20 21 22 public class CharcountMapper extends Mapper <LongWritable, Text,Text, IntWritable>{ @Override protected void map (LongWritable key, Text value, Context context) throws IOException, InterruptedException { char [] cs=value.toString().toCharArray(); for (char c : cs){ context.write(new Text (c+"" ),new IntWritable (1 )); } } }
(3).编写Reducer类,CharcountReducer.java
1 2 3 4 5 6 7 8 9 10 11 12 13 14 15 16 17 18 19 20 21 public class CharcountReducer extends Reducer <Text, IntWritable, Text, IntWritable> { @Override protected void reduce (Text key, Iterable<IntWritable> values, Context context) throws IOException, InterruptedException { int sum = 0 ; for (IntWritable value : values) { sum += value.get(); } context.write(key, new IntWritable (sum)); } }
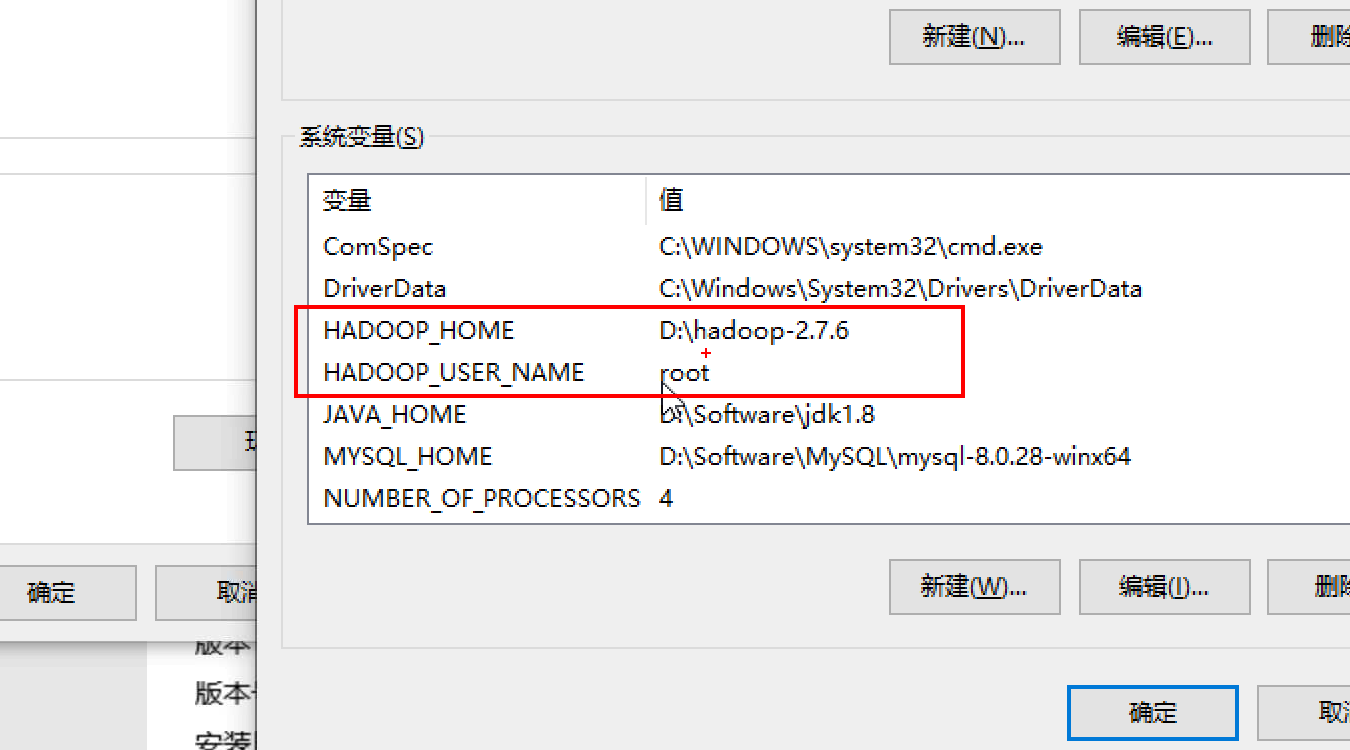
2.Windows上的Hadoop环境配置 进行系统环境变量配置:
需要在Windows平台上,解压Hadoop安装包文件
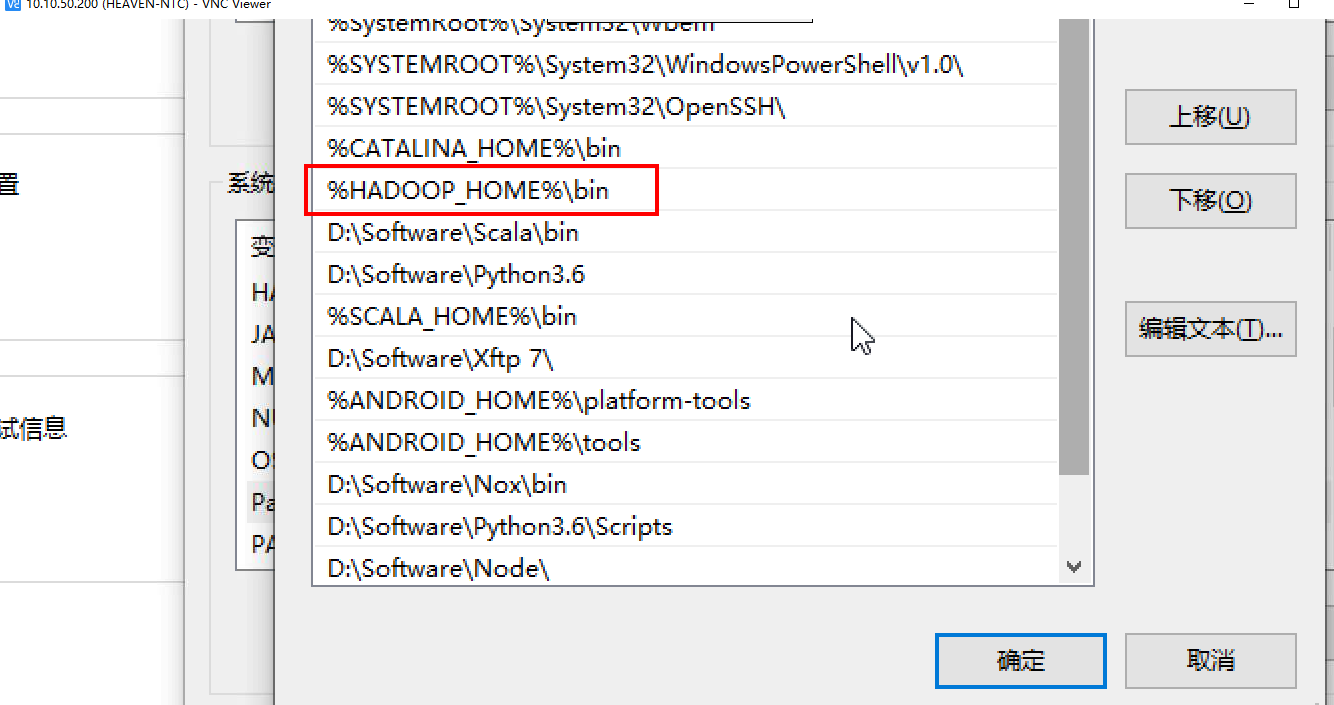
在系统变量中需要添加以下信息,
在Path里添加一个bin目录,
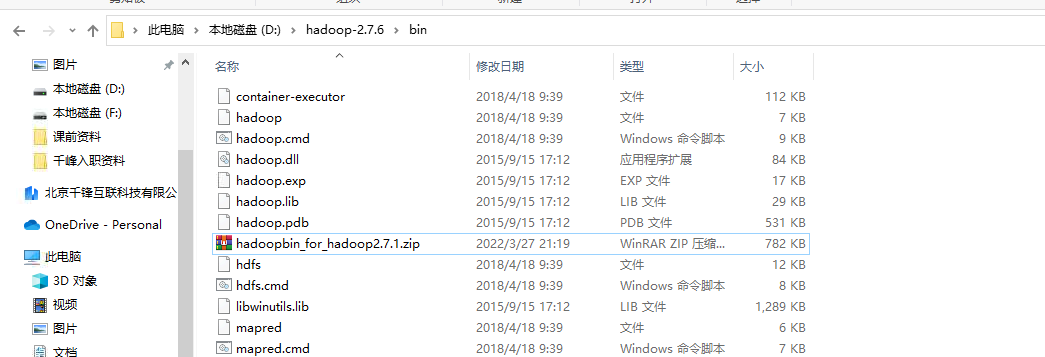
下载hadoopbin压缩包,放到hadoop-2.7.6的bin目录下,并解压到此文件夹下。
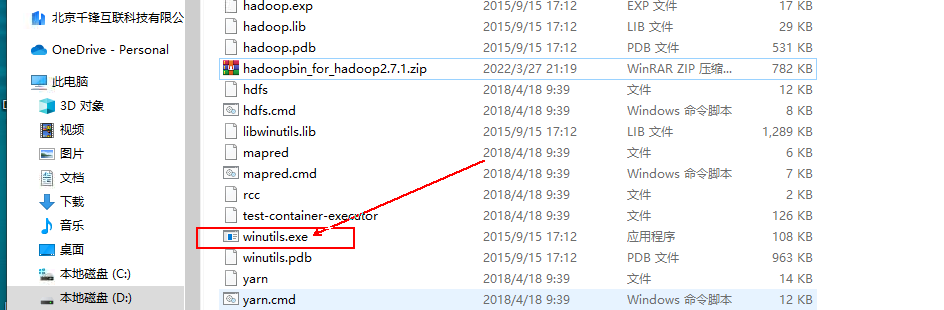
双击exe文件:打开是一闪而过的,说明环境配置是正常的。
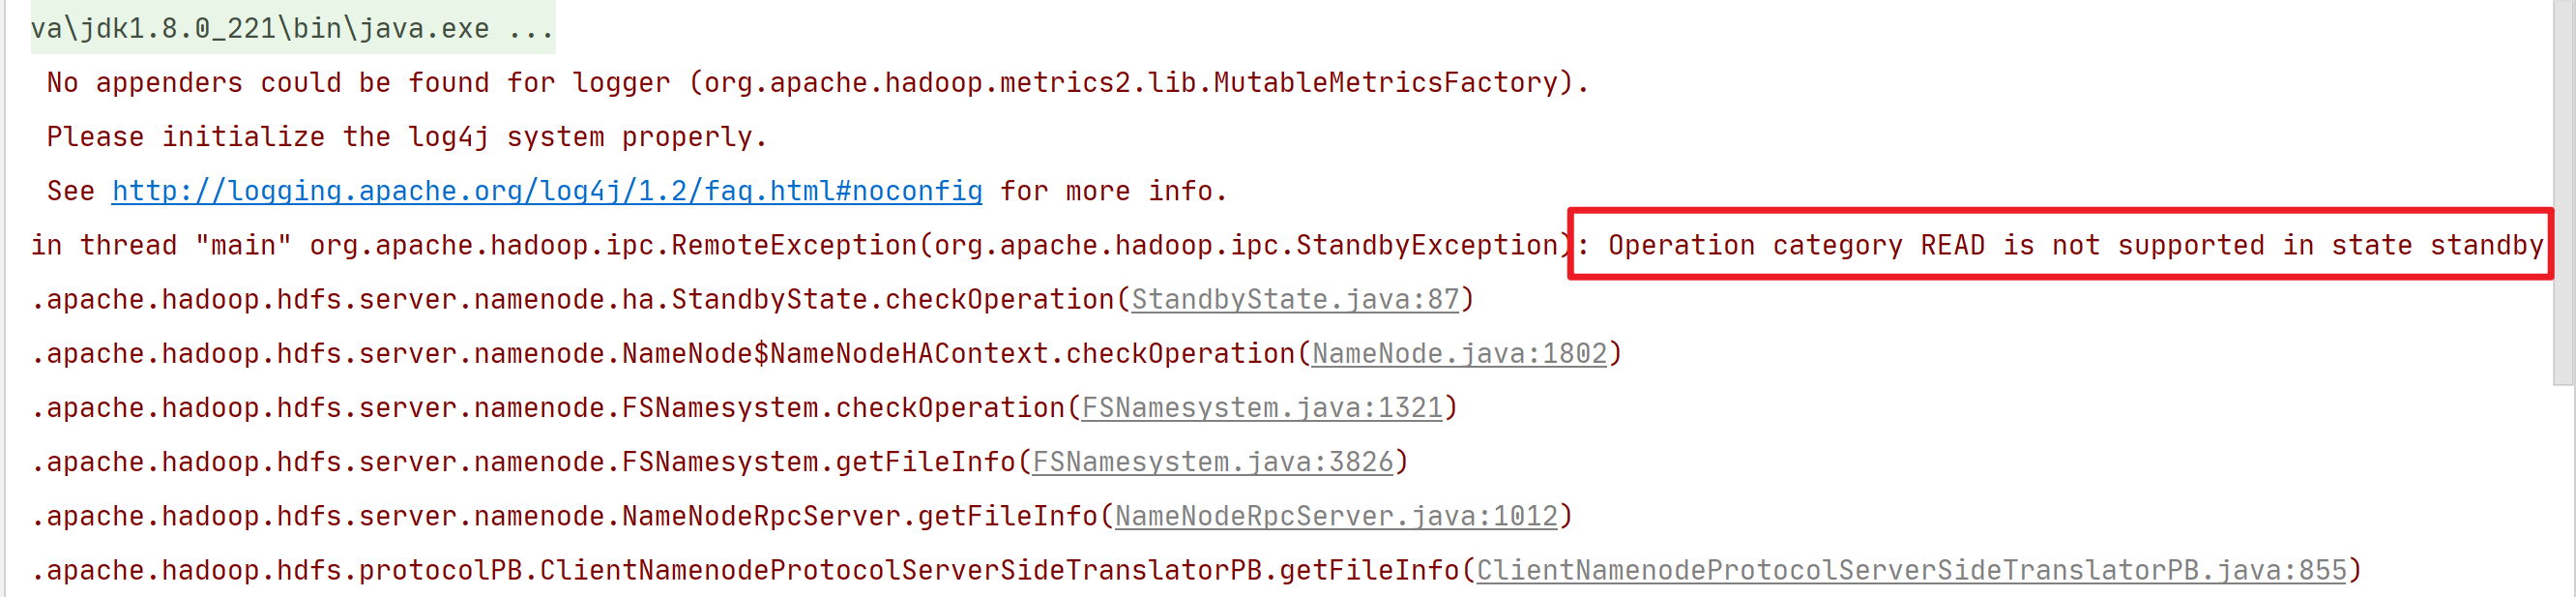
3.查看字符统计结果 运行CharcountDriver.java程序,运行成功返回的退出码应为exit code 0。
若出现报错查看报错信息,下面的意思是说,该节点是stanby节点,需要将代码里的IP改为活跃节点的IP。
接着打开浏览器,查看字符统计结果。
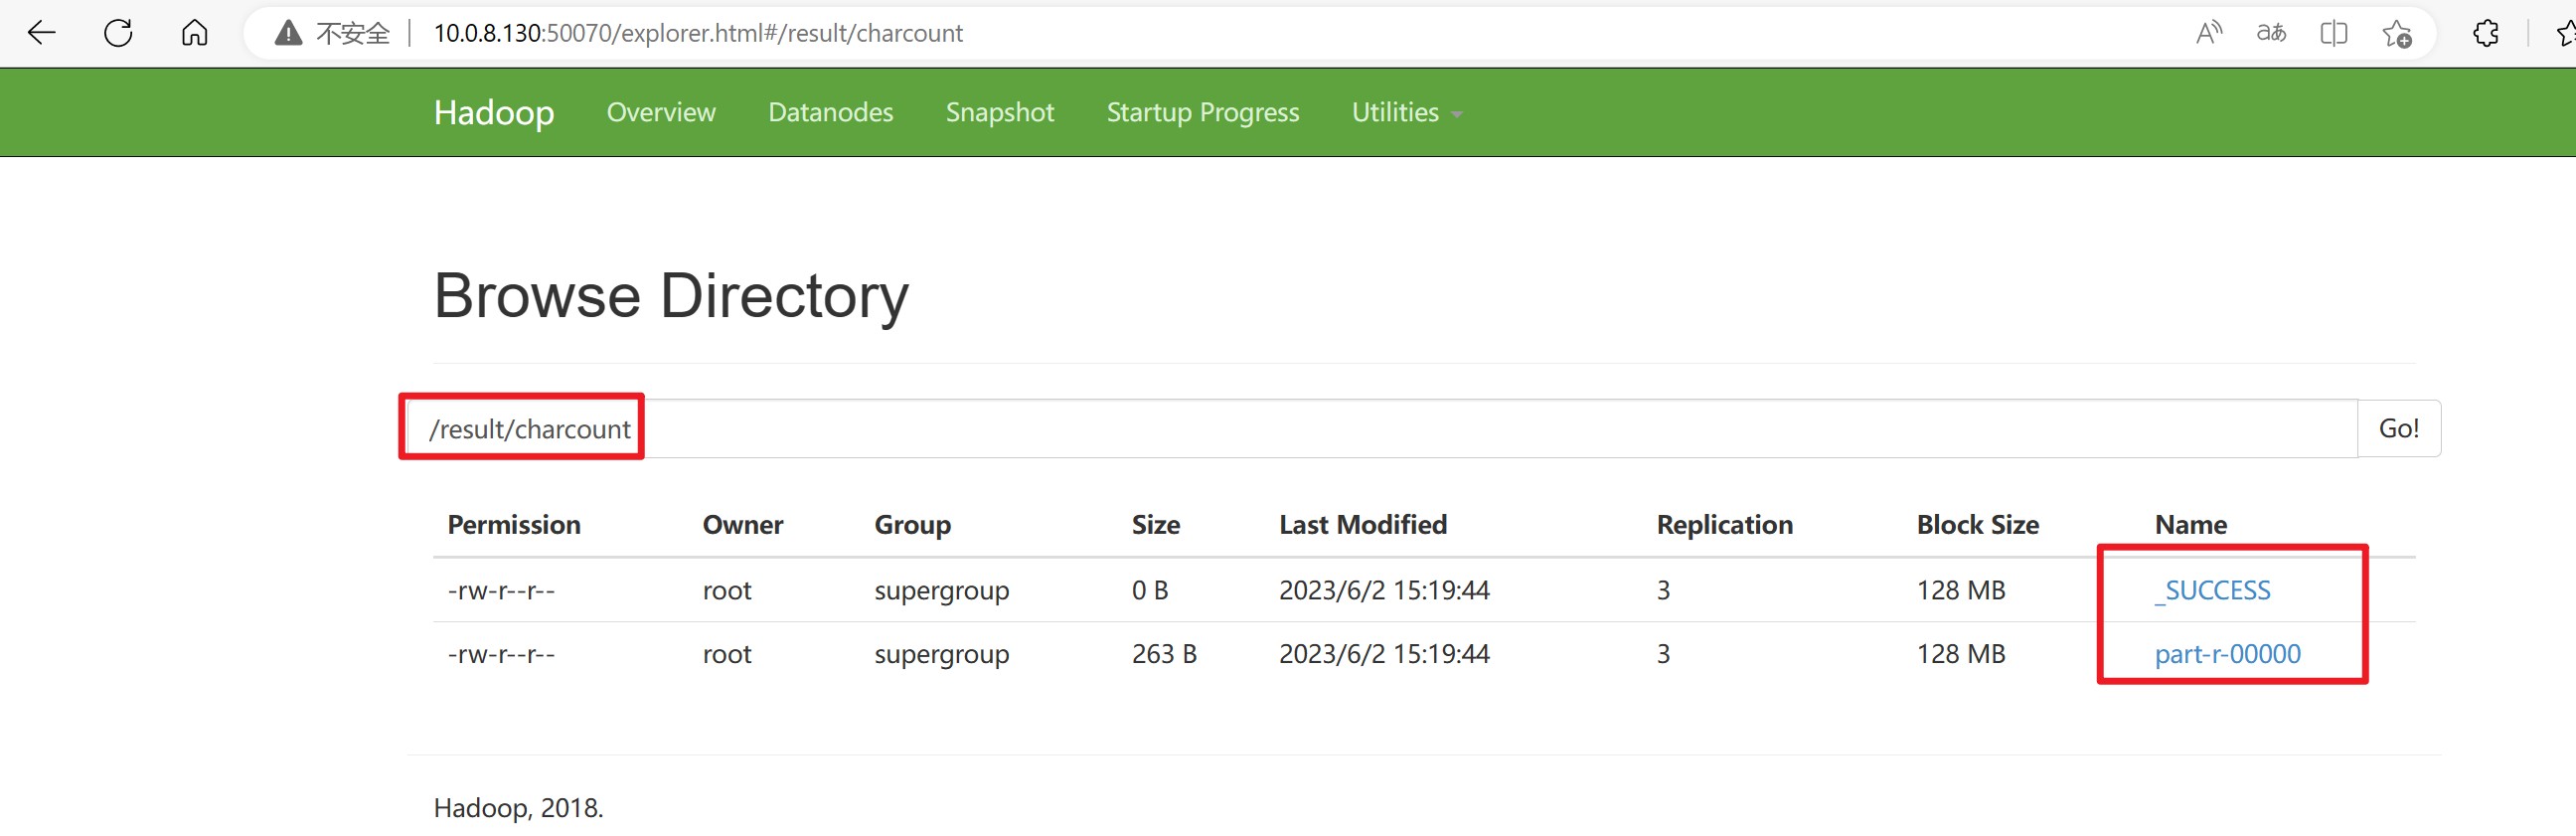
进入节点状态的为Active的文件系统的网页,查看/result/charcount目录下是否有以下两个文件。
可以看到下面的两个文件,说明我们的CharCount程序运行成功,并返回了结果文件 part-r-00000。
在对应的结点的终端里,使用HDFS命令将统计的结果文件下载到Linux环境本地,来查看字符统计结果,
1 2 3 4 5 6 7 8 9 10 11 12 13 14 15 16 17 18 19 20 21 22 23 24 25 26 27 28 29 30 31 32 33 34 35 36 37 38 39 40 41 42 43 44 45 46 47 48 49 50 51 52 53 54 55 56 [root@qianfeng02 ~]# hadoop fs -get /result/charcount/part-r-00000 [root@qianfeng02 ~]# cat part-r-00000 1430 ! 3 " 6 ' 7 , 59 - 2 . 66 : 1 ; 1 ? 1 A 20 B 3 C 3 D 1 E 1 F 1 G 5 I 23 L 5 M 4 N 21 O 3 P 2 S 4 T 11 W 15 Y 2 a 480 b 99 c 164 d 226 e 760 f 180 g 137 h 348 i 476 j 19 k 46 l 282 m 148 n 388 o 520 p 77 q 6 r 343 s 370 t 588 u 163 v 71 w 132 x 5 y 109 z 6 [root@qianfeng02 ~]#
到这一步说明你的程序和环境都没毛病,哈哈继续加油!